


Creating a simple file uploader using a form.
Attention!
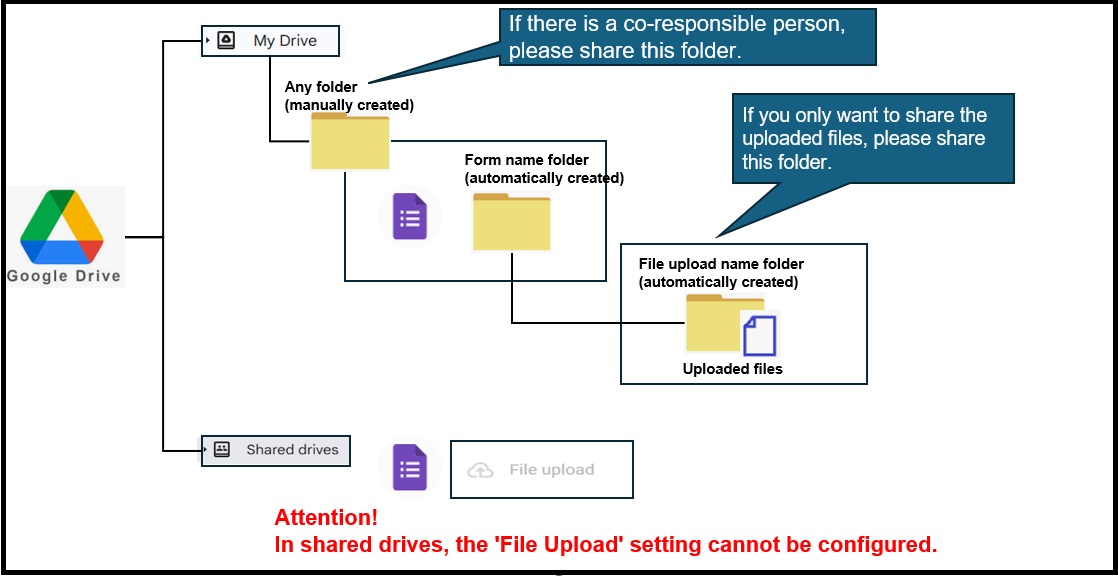
- The file upload feature cannot be used in shared drives.
- If you wish to continue using the form after the owner has left, please make sure to transfer ownership in My Drive before creating the form.
- If unused forms remain publicly accessible, unnecessary files may be uploaded, which can lead to problems such as the storage capacity of My Drive being overwhelmed. Please be mindful when using the upload feature and managing the form.
How to Create a Google Form with File Upload
[Form Creation]
- Access Google Drive.
- Navigate to the location (folder) where you want to create the form.
-
From the top-left corner, click on [+ New] and select Google Forms.
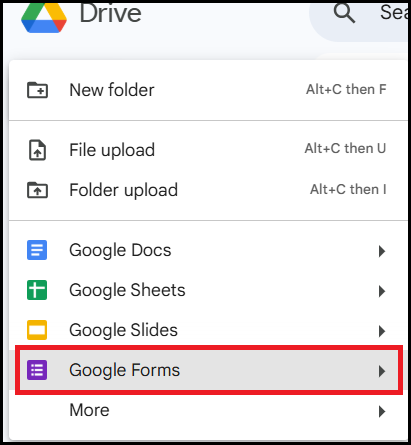
Figure 1: Creating a Form
-
From the feature selection options, select [File upload].
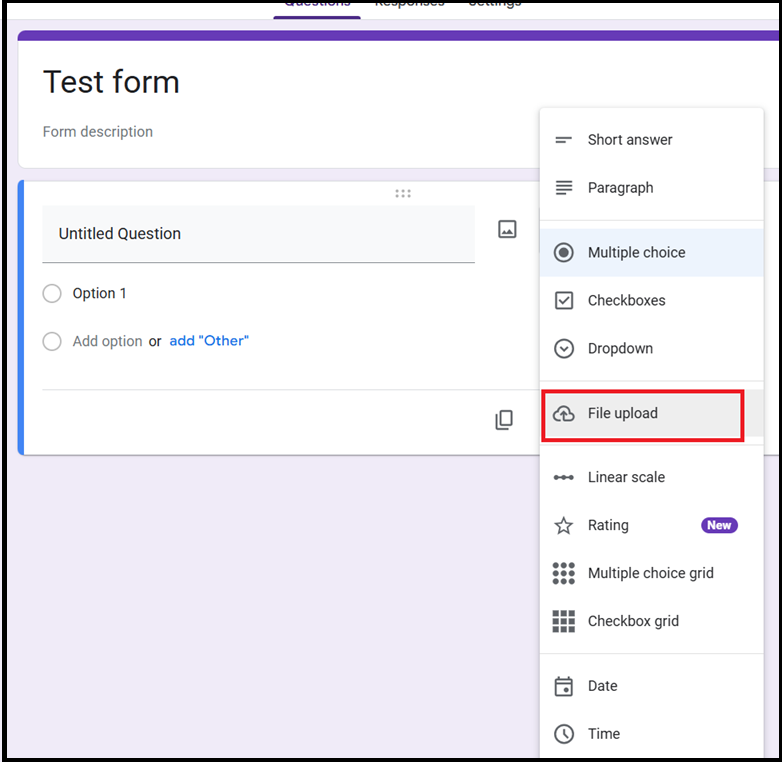
Figure 2: Creating a Form
-
For forms with file upload functionality, respondents must log in to Google.
Click on "Continue."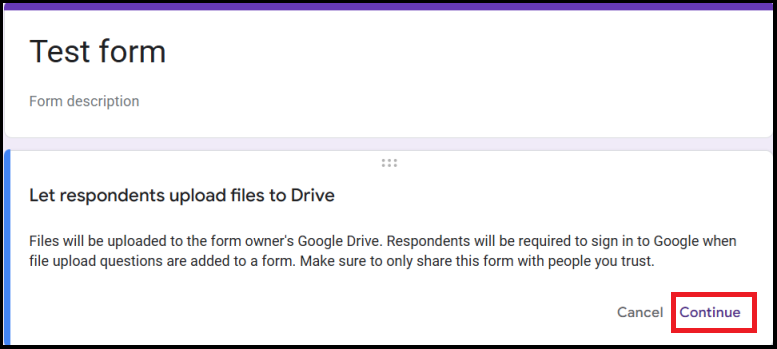
Figure 3: Creating a Form
-
Add description and required fields.
In the example, fields such as name and student number are added.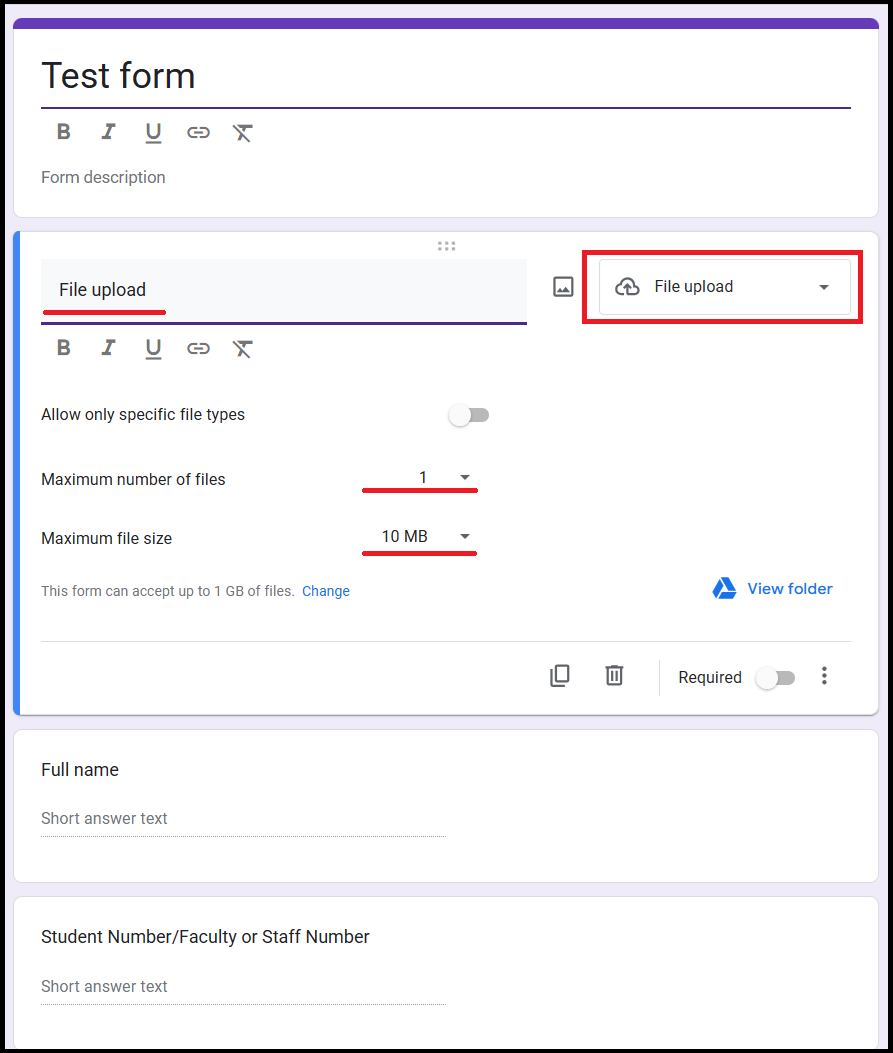
Figure 4: Creating a Form
[Responses Tab]
-
To post responses to a spreadsheet, select the responses tab.
Click on the link to the spreadsheet.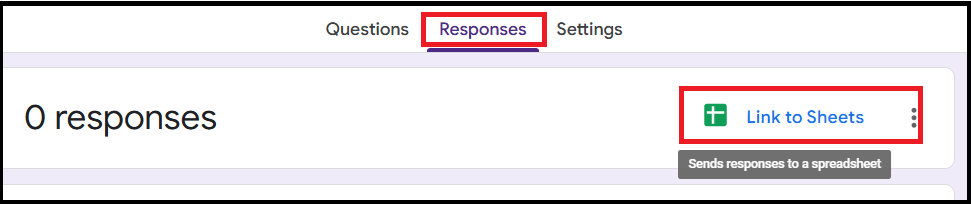
Figure 1: Responses Tab
-
To create a new spreadsheet, select the first option.
To add to an existing spreadsheet, select the second option.
Once decided, click "Create."
Figure 2: Responses Tab
[Settings Tab]
-
In the settings tab, you can adjust settings related to responses and display. Please set according to your needs.
[Reference URL]
View & manage form responses
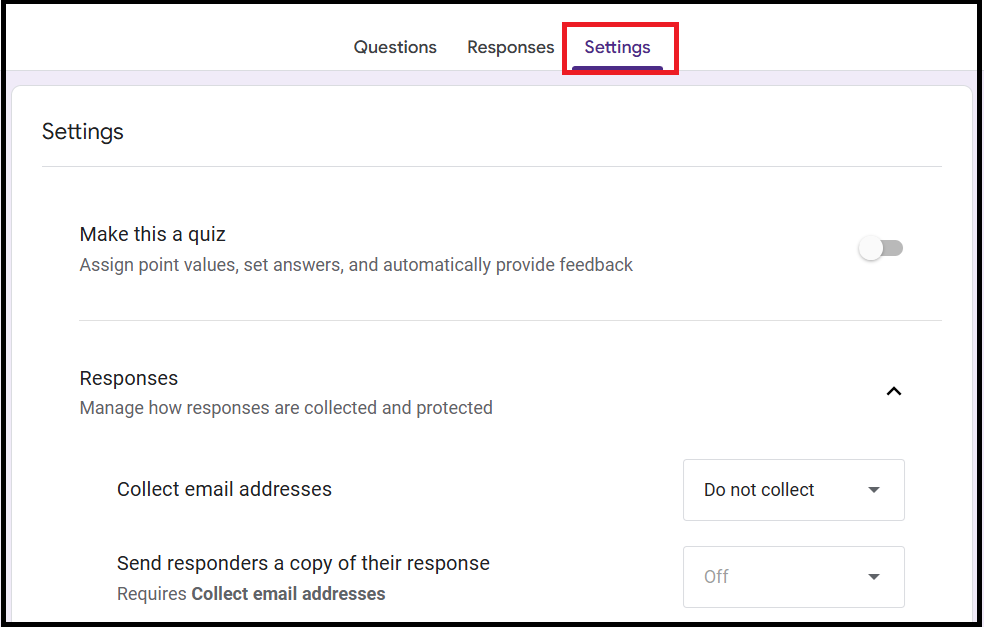
Figure 1: Settings Tab
[Publish]
-
Once all settings are complete, click the "Published" button in the top-right corner.
For the respondent view, set it according to your needs, such as "Keio University" or "Anyone with the link," then click "Done."
Check the publish settings on the public screen and click the "Save" button.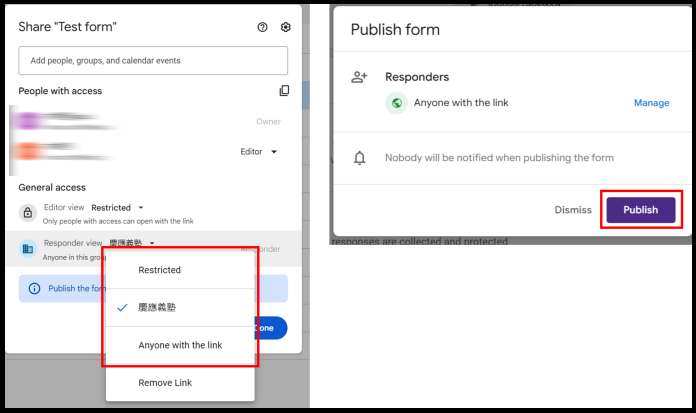
Figure 1: Publish
-
Clicking the "Publish" button will display options for publishing.
Click "Copy responder link " and select "Copy," or check "Shorten URL" and copy the link.
Notify users with the copied URL.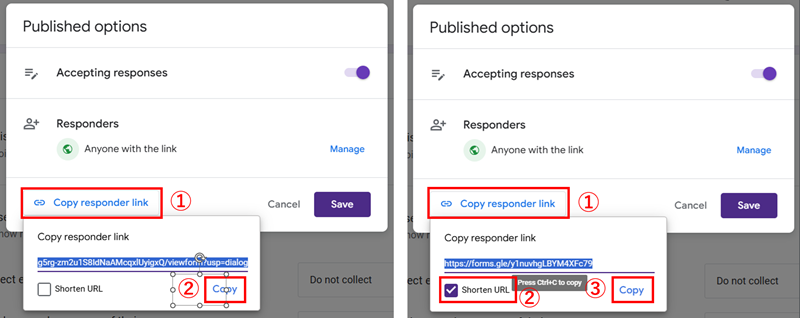
Figure 2: Publish
[Storage Location]
Uploaded files will create a "filename + (File responses)" folder.
A subfolder will be created with the folder name as specified in the file upload settings, and the actual files will be stored within it.
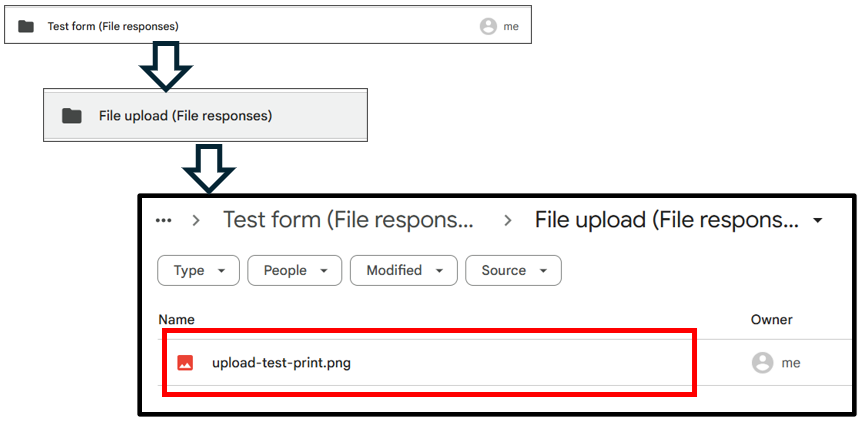
Figure 1: Storage Location
If you want to automatically move files submitted via Google Forms to a shared drive, the following documents and resources may be helpful.
This topic is outside the scope of KIC support, and it is at your own responsibility (we will not respond to any inquiries).
This topic is outside the scope of KIC support, and it is at your own responsibility (we will not respond to any inquiries).
How to Stop the Public Access of the Upload Form
-
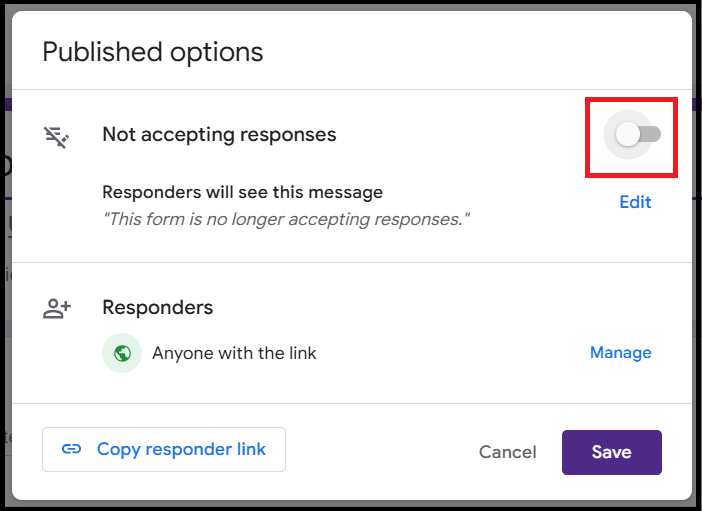
Click the "Published" button in the top-right corner of the form's editing screen.
Turn off the "Accepting responses" option and then click the "Save" button.
Last-Modified: February 19, 2025
The content ends at this position.