


Example of Mozilla Thunderbird POP3 settings(OAuth)
Introduction
Contents of this manual are "Operation Confirmation" under the following environment.
Software : Thunderbird(ver.139.0.1)
OS: Windows11 (64bit)
Please perform the following procedure. When setting up, you will need to log in to keio.jp. Please check your Keio ID and password in advance.
Perform the following steps in order.
Procedure 1: setting under Gmail
-
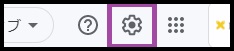
Log into the Gmail, and then click gear icon in the top right corner.
-
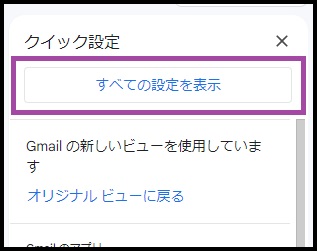
Click "Setting".
-
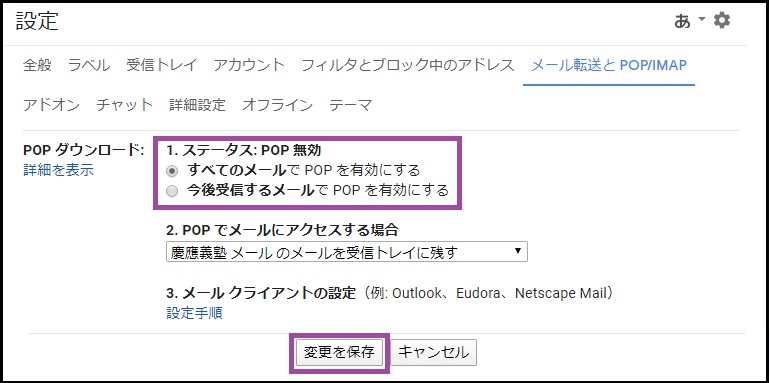
Click "email forwarding and POP/IMAP".

-
Under [POP download], turn on [Enable POP for all mail] or [Enable POP for mail that arrives from now on] and click [Save Changes].
Procedure 2: setting under Mozilla Thunderbird.
- Start Mozilla Thunderbird.
-
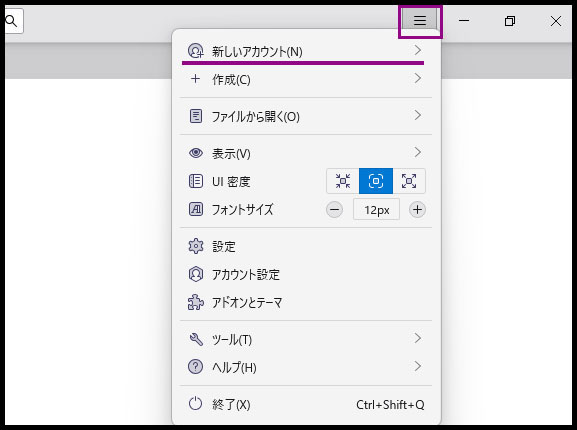
Click [[≡]icon] → [new email account]
-
Click [Email] and advance to next step.

-
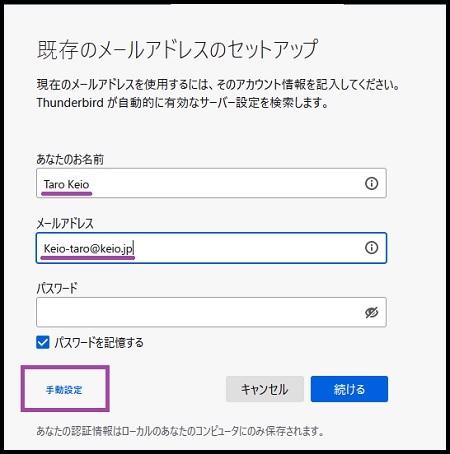
Perform [Setting Email Account].
Enter the following information as reference information.Email address Enter Keio ID.
Example: keio-taro@keio.jp
Precaution:enter including state after @mark.
Password None -
After entering each item, click [Manual Settings].
-
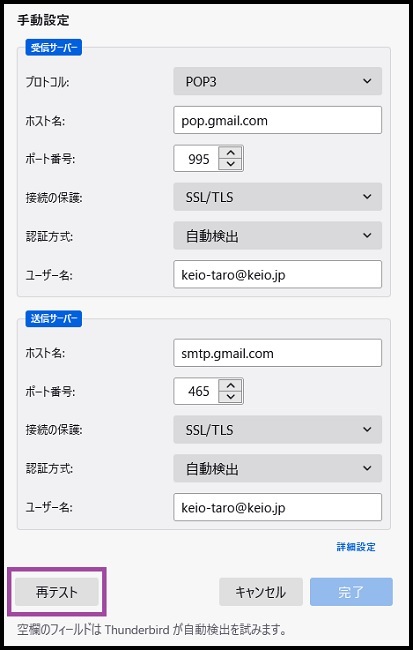
Perform [Set Mail Account] referring to the following information.
Server's host name Port SSL Verification method Receiving server POP3 pop.gmail.com 995 SSL/TLS automatic detection Sending server SMTP smtp.gmail.com 465 SSL/TLS automatic detection User name
Receiving serverEnter 「recent:」 + Keio ID
Example)recent:keio-taro@keio.jp
Precaution: enter including state after @mark.User name
Sending serverEnter Keio ID
Example)keio-taro@keio.jp
Precaution: enter including state after @mark. -
Click [Retest] after entering each item.
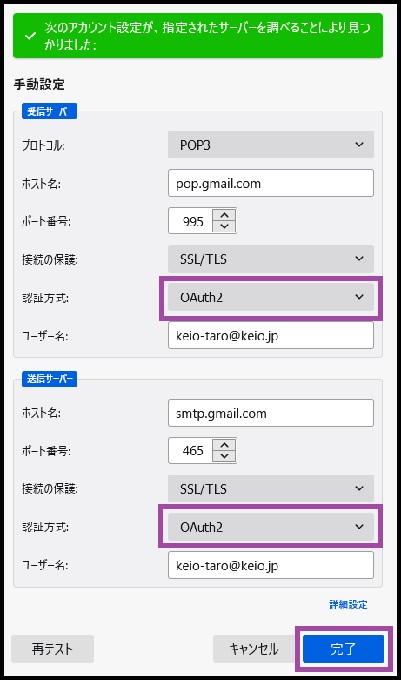
-
After retesting, the following screen will be displayed, so please set the authentication method to [OAuth2].Click the [Done] button to finish.
-
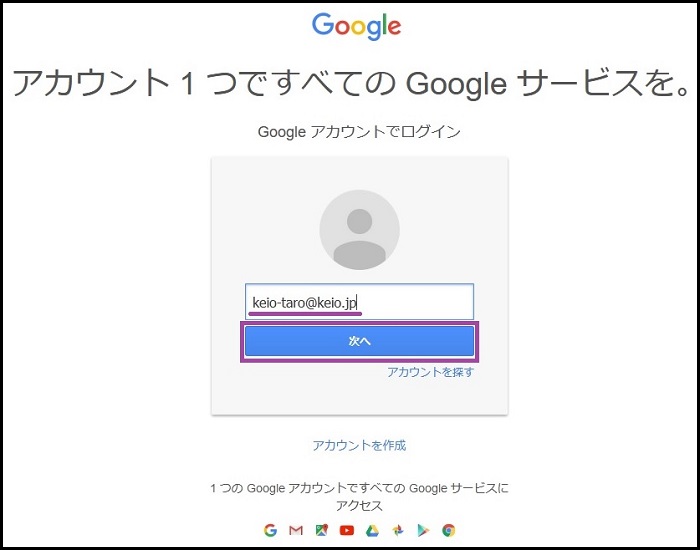
The Google login screen will be displayed. Enter your Keio ID (e.g. keio-taro@keio.jp) and click [Next].
- The keio.jp authentication screen will be displayed, so please log in.
-
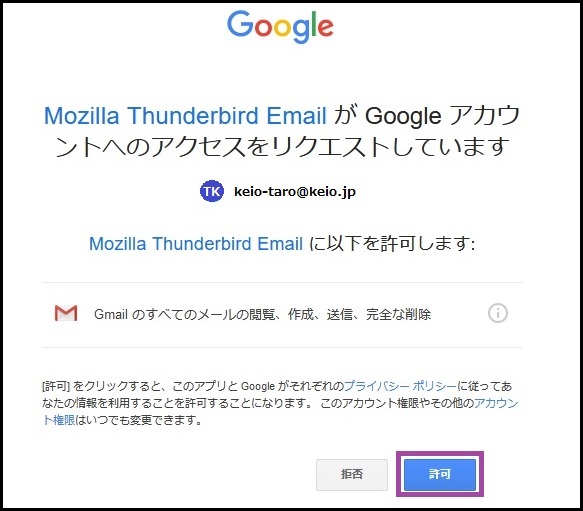
You will be requested to access your Google account, so just click Allow to complete the process.
If the Account Settings screen is displayed, click [OK].
This completes the procedures.
Revision History
2020/02/27: First created
2022/08/17: Software and OS version updates
Last-Modified: June 9, 2025
The content ends at this position.