


Example of Mozilla Thunderbird IMAP settings(OAuth)
Introduction
Contents of this manual are "Operation Confirmation" under the following environment.
Software: Thunderbird(ver 147.0.2)
OS: Windows11 Pro 25H2 (64bit)
Please perform the following procedure.
When setting up, you will need to log in to keio.jp.
Please check your Keio ID and password in advance.
Procedure: setting under Mozilla Thunderbird
- Start Mozilla Thunderbird.
-
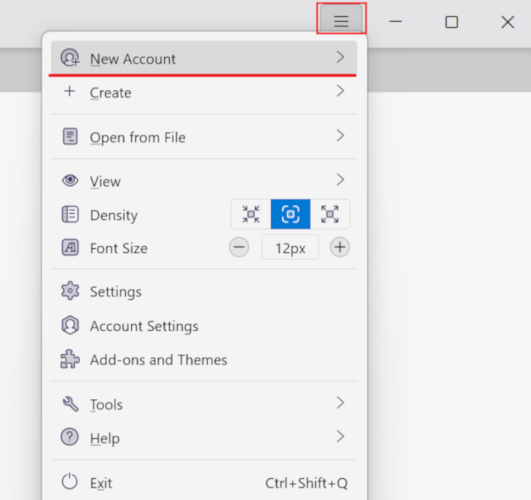
Click [≡]Icon → [New Account]
-
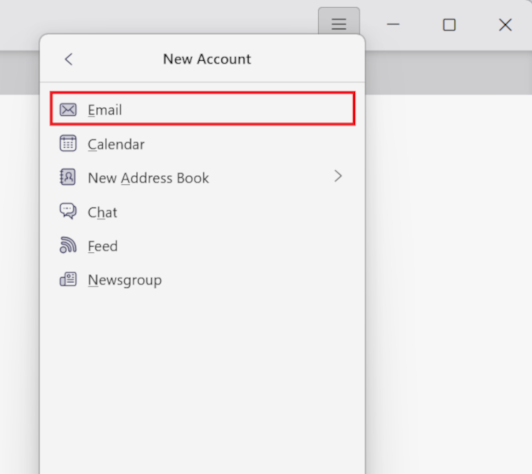
Click [Email] and advance to next step.
-
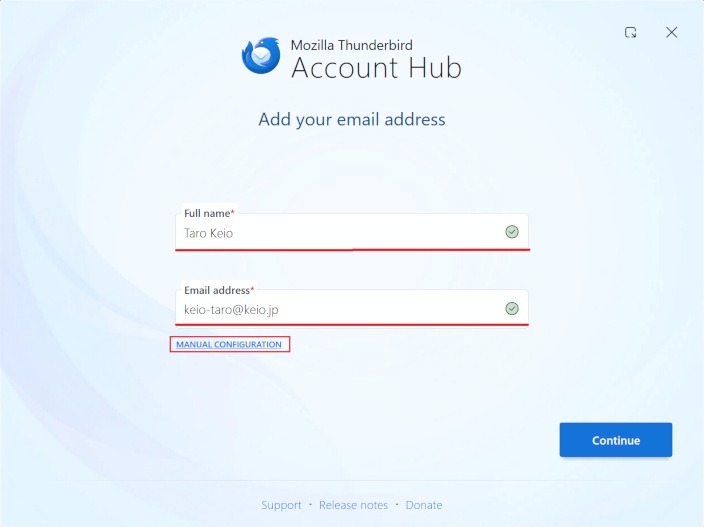
Configure the [Add Email Address] settings. Enter the following information as reference information:
After entering the information, click [MANUAL CONFIGURATION].Full name Type your name (This information will be used for your sender information). Email address Your Keio ID (Example: keio-taro@keio.jp).
Precaution: enter including state after @mark.
-
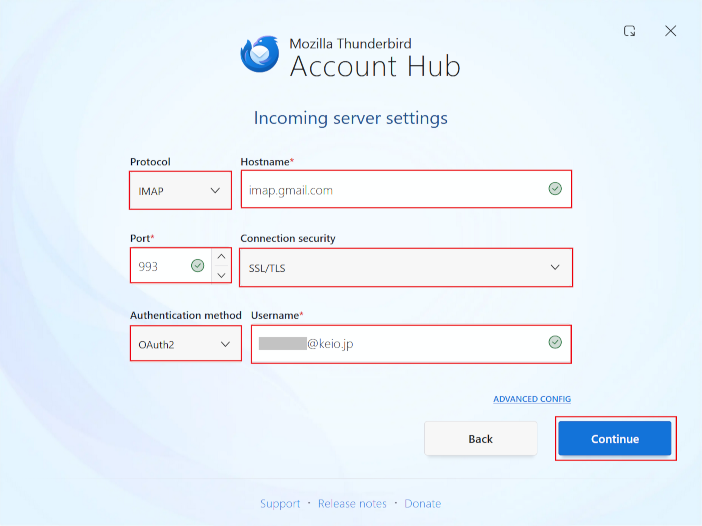
Configure the [Incoming server settings]. Perform settings referring to the following information:
After entering the information, click [Continue].Protocol IMAP Hostname imap.gmail.com Port 993 Connection security SSL/TLS Authentication method Oauth2 Username Username: Your Keio ID (Example: keio-taro@keio.jp).
Precaution: enter including state after @mark.
-
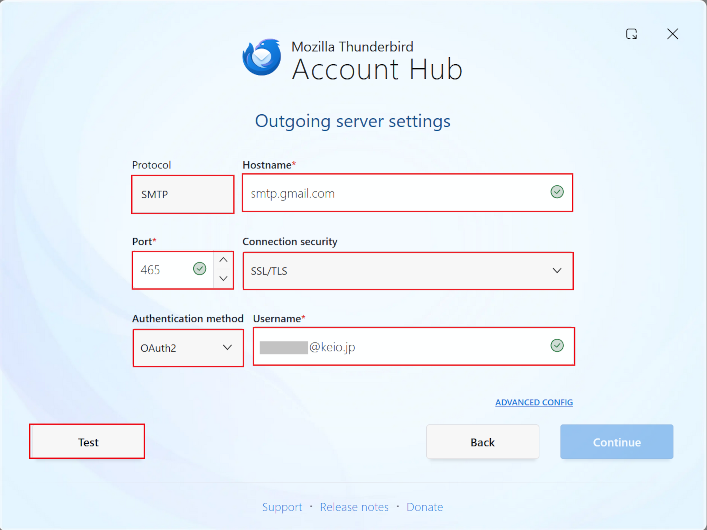
Configure the [Outgoing server settings]. Perform settings referring to the following information:
After entering the information, click [Test].Protocol SMTP Hostname smtp.gmail.com Port 465 Connection security SSL/TLS Authentication method Oauth2 Username Your Keio ID (Example: keio-taro@keio.jp).
Precaution: enter including state after @mark.
-
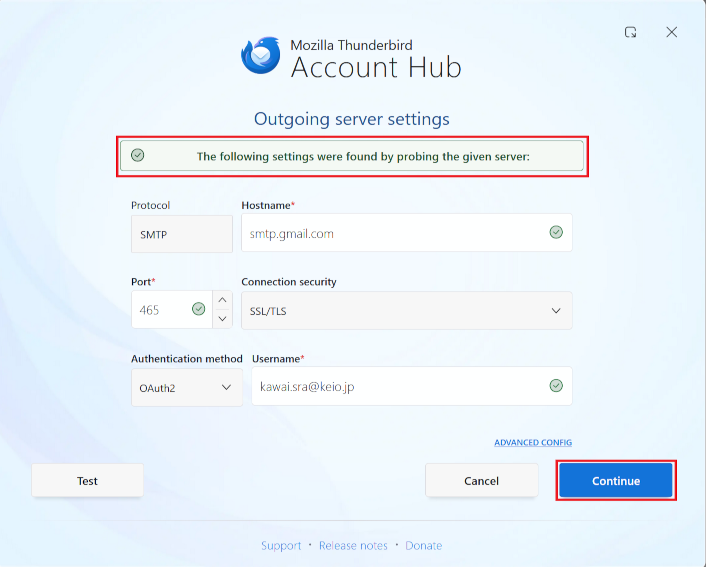
If the message "The following settings were found by probing the given server:" appears at the top of the screen, click [Continue].
-
The Google login screen will be displayed. Confirm that your Keio ID (e.g. keio-taro@keio.jp) is entered and click [Next].
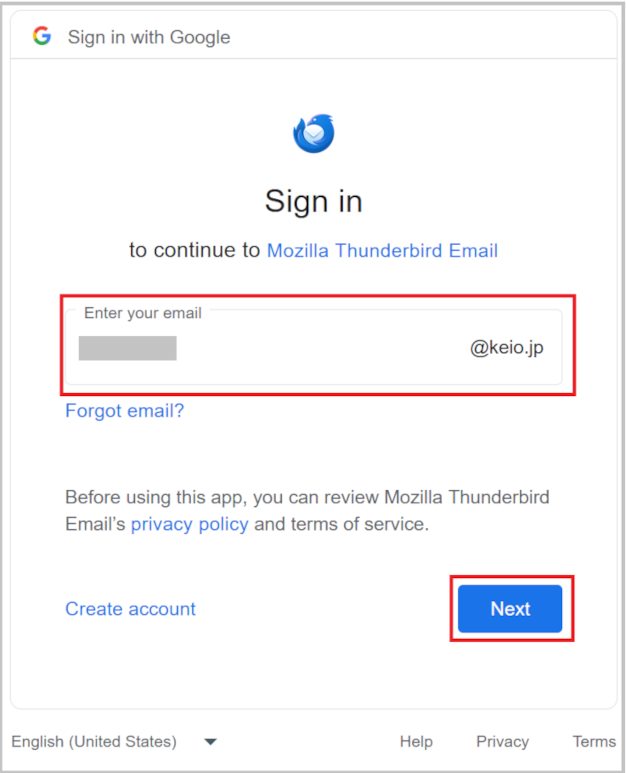
- The keio.jp authentication screen will be displayed, so please log in.
-
You will be requested to access your Google account, so click [Allow].

-
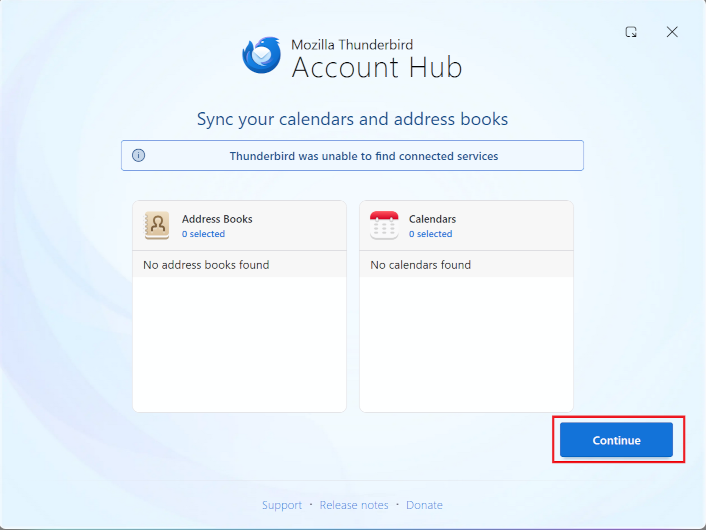
The "Sync your calendars and address books" screen will appear. Click [Continue].
-
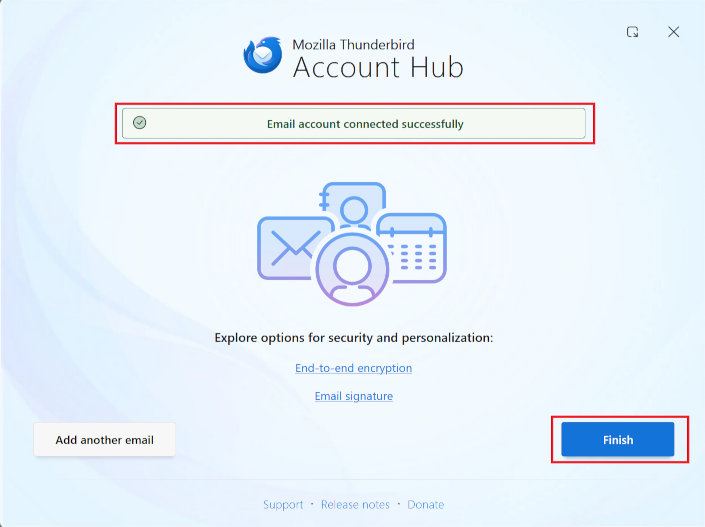
If "Email account connected successfully" is displayed, the connection setup is complete. Click [Finish] to finish the process.
Revision History
2020/02/27: First created
2022/08/17: Software and OS version updates
2026/03/17: Software and OS version updates. Changed configuration steps and images due to the addition of the "Account Hub" feature.
Last-Modified: March 18, 2026
The content ends at this position.